Upgrade Firmware via USB Cable
This page contains the complete USB firmware upgrade procedure. All steps can be completed on this page without opening another guide.
Prepare the Firmware and Upgrade Tools
Required Equipment
- RK182X Developer Kit development board
- Firmware
- Host computer
- Type-A Cable
The firmware can be obtained by compiling the SDK or downloaded as public unified firmware from the resource download page.
Firmware Formats
There are two types of firmware files:
- A single unified firmware: a single file containing the partition table, bootloader, uboot, kernel, system, and other partitions. Upgrading it updates all partition data and erases the existing data on the board.
- Multiple partition images: independent files such as the partition table, bootloader, and kernel. An individual image updates only its corresponding partition, which is useful during development.
The unified firmware packing tool can unpack a unified firmware into partition images or merge partition images into a unified firmware.
Install the Upgrade Tool
Windows
- Download Release_DriverAssistant.zip, extract it, and run
DriverInstall.exe. - Select Driver uninstall first, then select Driver install so all devices use the updated driver.
- Download AndroidTool separately, extract it, and run
RKDevTool.exein theRKDevTool_Release_v2.xxdirectory. On Windows 7/8, run it as administrator.
To avoid version-related burning problems, use the tool packaged inside the public firmware package when possible:
ITX-3588J_Android12_HDMI_220308
├── ITX-3588J_Android12_HDMI_220308.img
├── linux
│   └── Linux_Upgrade_Tool_v1.65.zip
└── windows
    ├── DriverAssitant_v5.1.1.zip
    └── RKDevTool_Release_v2.84.zip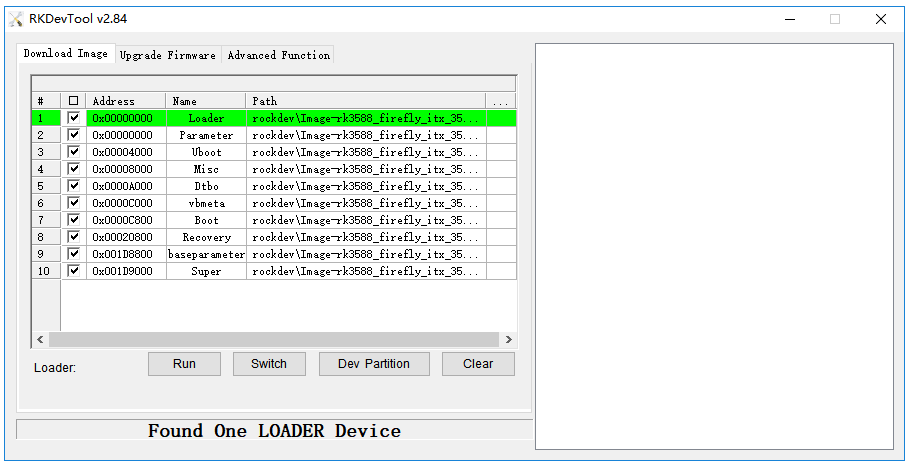
Linux
Linux does not require a device driver.
Install Linux_Upgrade_Tool so it can be called from any directory:
unzip Linux_Upgrade_Tool_xxxx.zip
cd Linux_UpgradeTool_xxxx
sudo mv upgrade_tool /usr/local/bin
sudo chown root:root /usr/local/bin/upgrade_tool
sudo chmod a+x /usr/local/bin/upgrade_tool
Install Linux_adb_fastboot:
sudo mv adb /usr/local/bin
sudo chown root:root /usr/local/bin/adb
sudo chmod a+x /usr/local/bin/adb

sudo mv fastboot /usr/local/bin
sudo chown root:root /usr/local/bin/fastboot
sudo chmod a+x /usr/local/bin/fastboot
Enter and Check MaskRom Mode
The RK182X development kit does not provide a Loader mode. USB firmware upgrades use the board's MaskRom key.
Enter MaskRom Mode
- Disconnect the development kit from the power supply.
- Set the
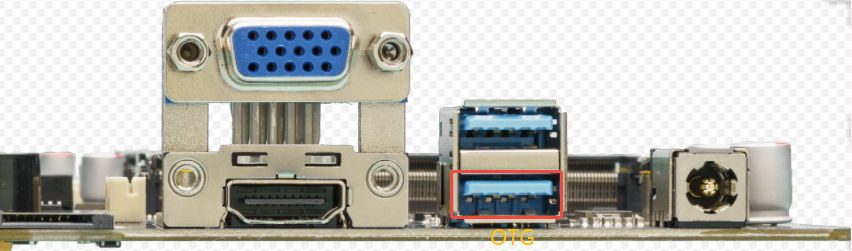
USB SELswitch to1. - Connect the OTG port to the host computer with a Type-A data cable.
- Press and hold the board's
MaskRomkey. - Power on the development kit while holding the key.
- Check the upgrade tool for a MaskRom device.
- Release the key after the device is detected.
Check MaskRom Mode
Windows
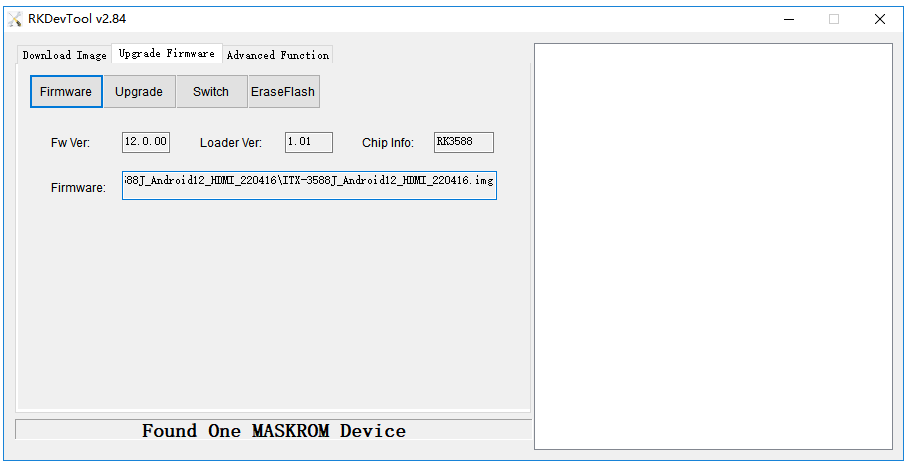
AndroidTool should display a MaskRom device in the device list. If the device is not detected, check the USB driver, the Type-A data cable, the USB SEL switch, and the OTG connection.
Linux
Run upgrade_tool and check whether the connected device is listed as MaskRom:
sudo upgrade_toolWrite the Firmware
Windows
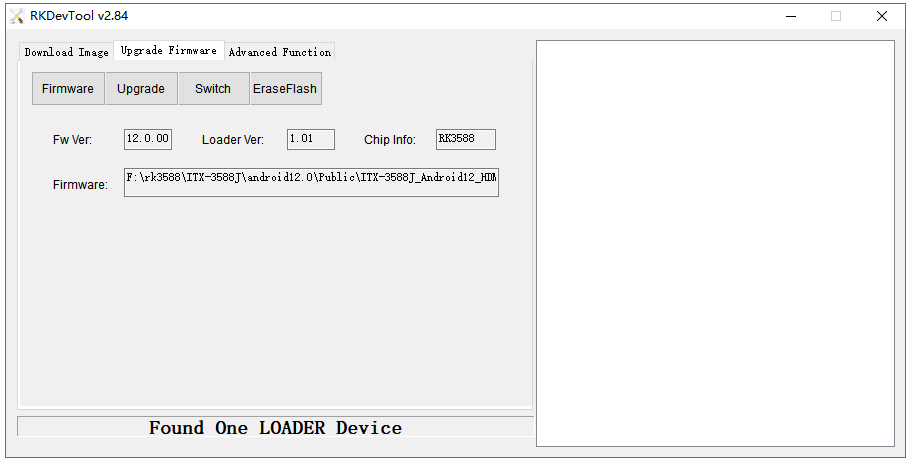
Write a Unified Firmware - update.img
- Switch to the Upgrade Firmware page.
- Click Firmware and open the firmware file.
- Click Upgrade to start writing.
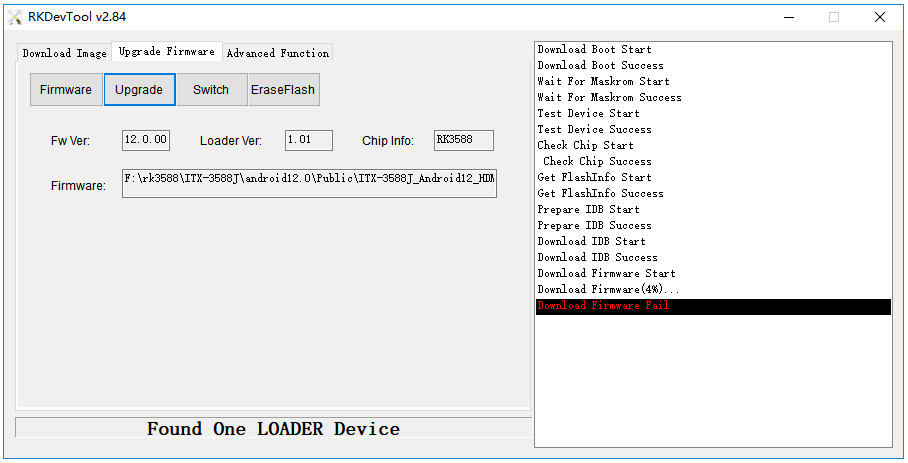
- If the upgrade fails, click EraseFlash first and then upgrade again.
Write Partition Images
- Switch to the Download Image page.
- Select the partitions to write.
- Confirm that each image path is correct.
- Click Run. The device restarts automatically after the upgrade.
Linux
Write a Unified Firmware - update.img
sudo upgrade_tool uf update.imgIf the upgrade fails, erase the flash and try again:
# The ef parameter requires a bootloader file or the corresponding update.img.
sudo upgrade_tool ef update.img
sudo upgrade_tool uf update.img
Write Partition Images
sudo upgrade_tool di -b /path/to/boot.img
sudo upgrade_tool di -r /path/to/recovery.img
sudo upgrade_tool di -m /path/to/misc.img
sudo upgrade_tool di -u /path/to/uboot.img
sudo upgrade_tool di -dtbo /path/to/dtbo.img
sudo upgrade_tool di -p parameter
sudo upgrade_tool ul bootloader.bin
If the upgrade fails because of flash errors, try low-level formatting and erasing the eMMC:
sudo upgrade_tool lf update.img
sudo upgrade_tool ef update.img
Fastboot Dynamic Partitions
adb reboot fastboot
sudo fastboot flash vendor vendor.img
sudo fastboot flash system system.img
sudo fastboot reboot
Upgrade Failure
If Download Boot Fail or another error appears during the upgrade, check the USB cable and the computer USB port first. Poor-quality cables and insufficient USB power can cause the failure.