Use SD card to upgrade firmware
introduce
This article mainly introduces how to upgrade the firmware on the motherboard through a MicroSD card.
To upgrade firmware using MicroSD, you need to use a card creation tool to write the unified firmware to the MicroSD card on your computer. Currently, this operation can only be completed on the Windows operating system.
Preparation tools
- Motherboard
- computer
- SD card
- USB card reader
- SocToolKit
Steps
- Download the firmware that needs to be upgraded to the motherboard.
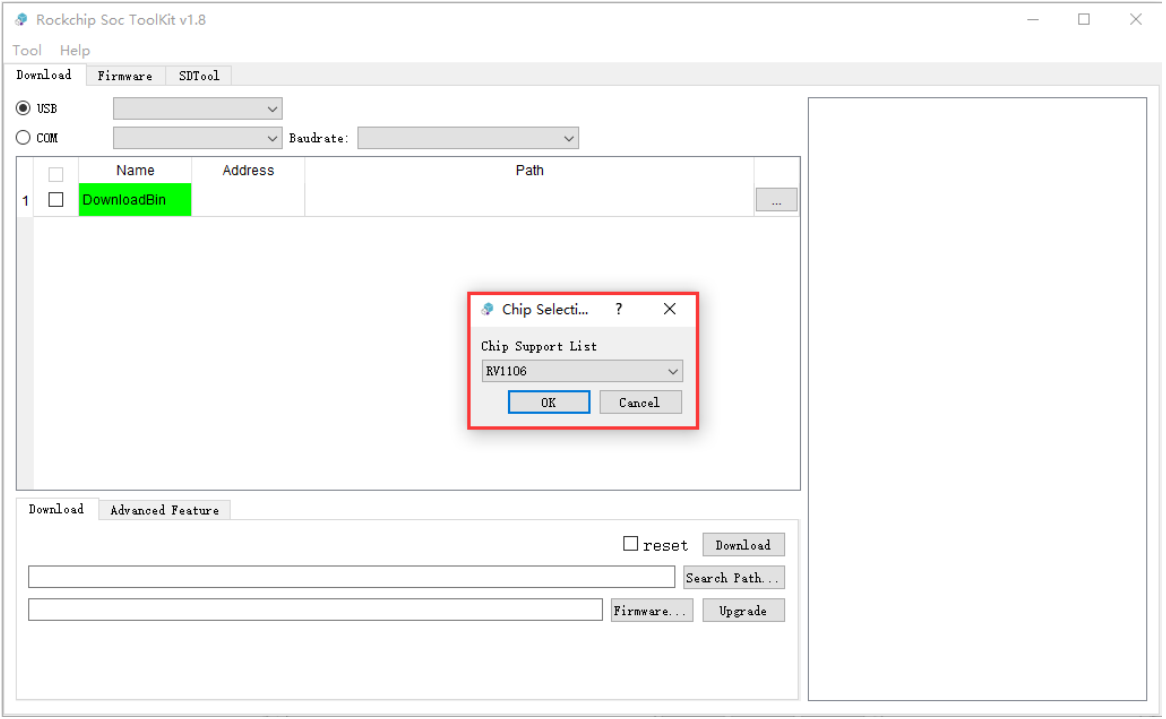
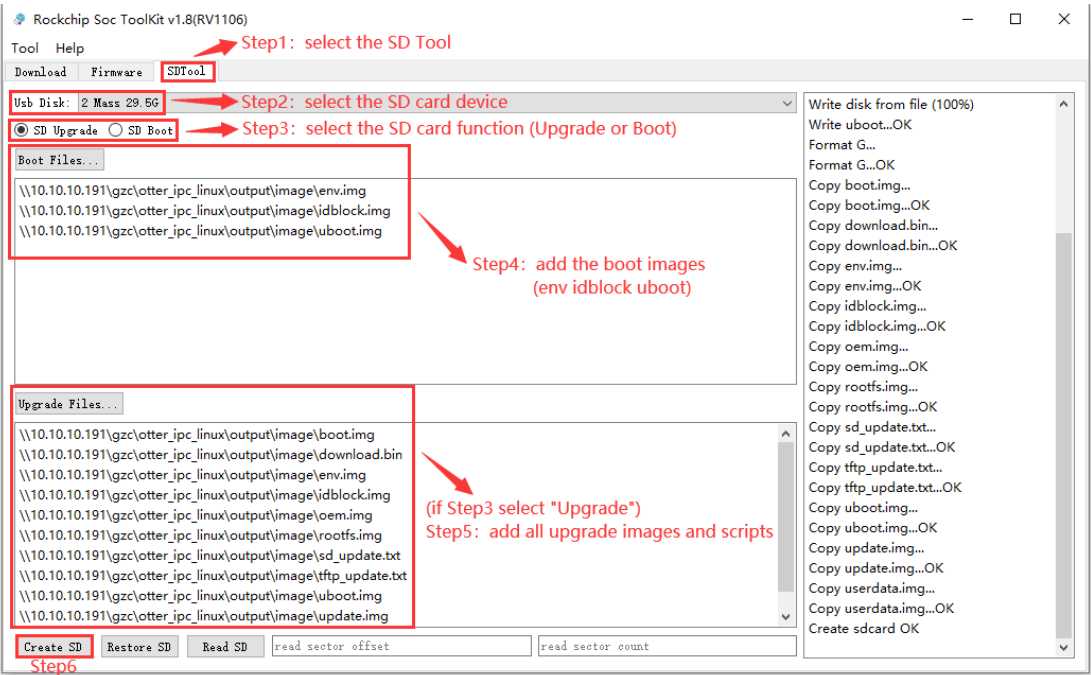
- Open SocToolKit, click SDTool and select MicroSD Card Tool.
- Select the MicroSD card device you want to operate.
- Select the role of the MicroSD card. Supports MicroSD card firmware upgrade and MicroSD card system startup. Select MicroSD card here to upgrade firmware.
- The current MicroSD card is used as an upgrade card, so all upgrade firmware needs to be added.
- Click the Create SD button to create a MicroSD upgrade card.
- Insert the successfully created MicroSD card into the device and then restart. The device will enter the U-Boot terminal in the MicroSD card first.
- If the MicroSD card has an upgrade function, the device will be automatically upgraded.
- After the upgrade is completed, you need to remove the MicroSD card and restart the device to enter the device system.
- Note 1: SocToolKit tool version 1.7 or higher is required to support the SD card upgrade boot function.
- Note 2: This function requires the user to run SocToolKit.exe as an administrator (it will ask by default when opening the tool).